HomeServerBlog cabinet cooling planner
Cabinet Thermal Load Calculator
Estimate cabinet heat from IT watts, PSU efficiency, rack count, fan heat, UPS/PDU losses, target temperature, delta-T, airflow CFM, containment quality, and safety margin.
▦Cabinet presets
⚙Thermal inputs
Thermal breakdown
Capacity check
📊BTU, kW, CFM, and margin cards
❄Cooling method grid
Vented cabinet fans
Best for low to moderate heat when the cabinet has clear intake and exhaust paths.
0 cabinetsCloset exhaust fan
Moves cabinet heat out of the room or closet so intake air does not climb.
0 CFMPortable or mini-split AC
Useful when heat load is too high for ventilation to a cooler adjoining space.
0 tonsDucted rear return
Separates exhaust from intake air for dense cabinets and quieter fan curves.
0 CFM📐Thermal reference tables
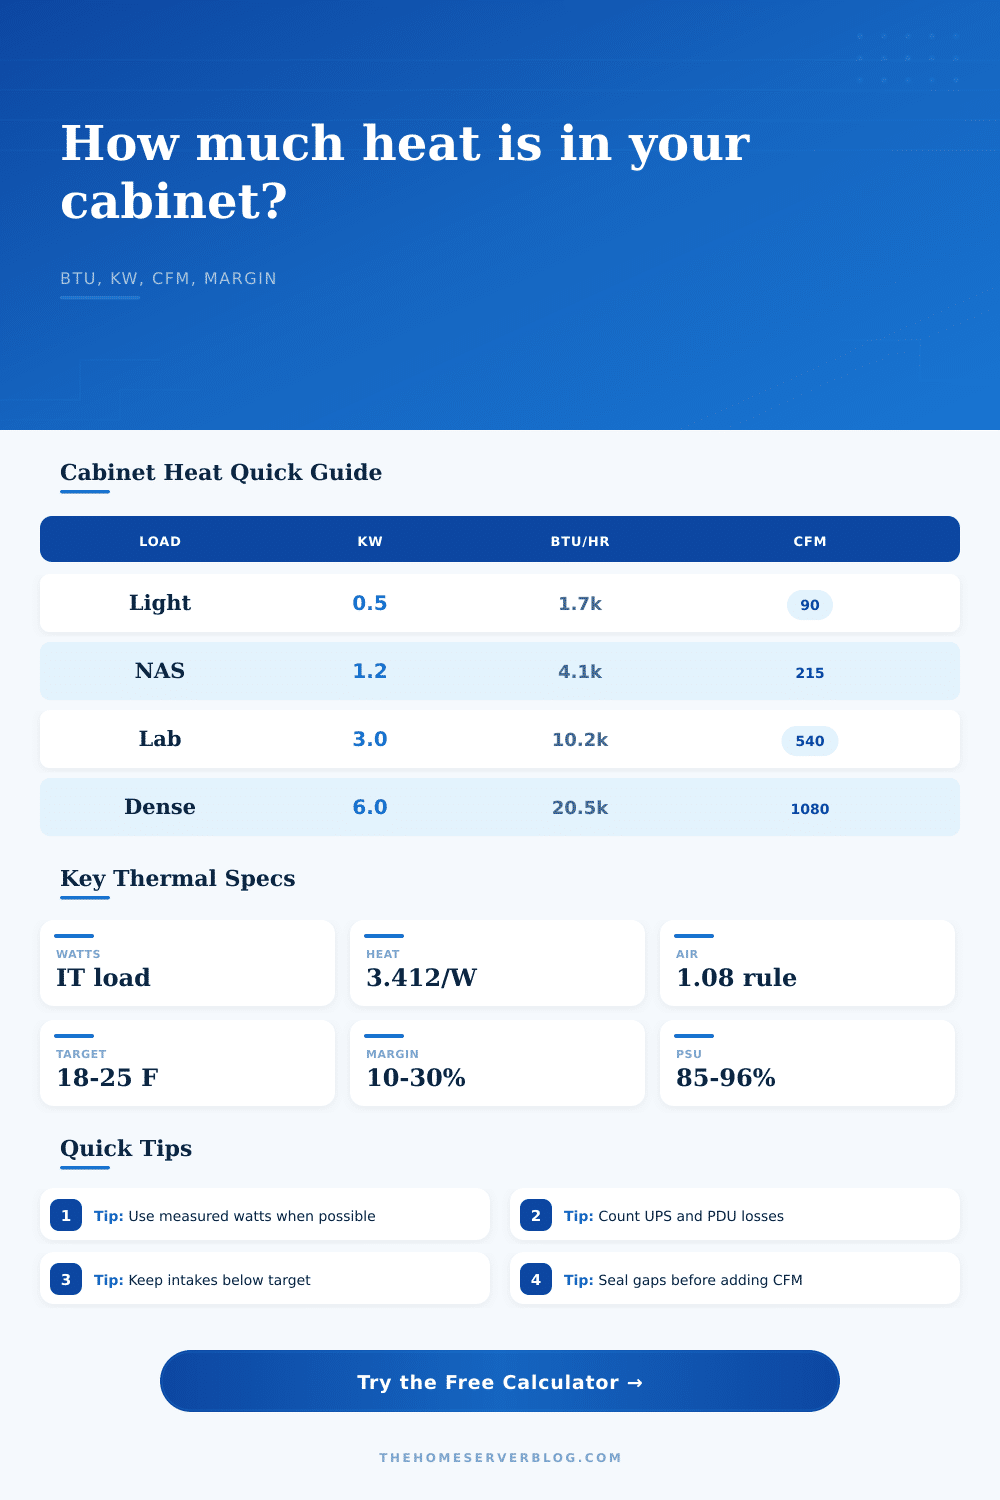
| Cabinet load | Wall heat | BTU/hr | CFM at 20°F |
|---|---|---|---|
| Small network wall box | 250 W | 853 | 40 CFM |
| NAS and switch cabinet | 750 W | 2,559 | 119 CFM |
| Mixed 24U home lab | 1,800 W | 6,142 | 284 CFM |
| Full virtualization rack | 4,000 W | 13,648 | 632 CFM |
| Dense compute cabinet | 8,000 W | 27,296 | 1,264 CFM |
Base values use watts x 3.412 and CFM = BTU/hr / (1.08 x delta-T).
| Delta-T target | Cabinet behavior | Airflow impact | Watch point |
|---|---|---|---|
| 8-12°F | Cool exhaust, high airflow | Very high CFM | Noise and dust pickup |
| 13-18°F | Balanced rack cooling | Moderate CFM | Good sensor placement |
| 19-25°F | Warmer but efficient | Lower CFM | Drive and PSU inlet temps |
| 26-32°F | Quiet but hot exhaust | Low CFM | Small summer buffer |
A cabinet can meet room temperature targets and still fail if top-U intake air recirculates.
| Containment type | Model factor | Good use | Common problem |
|---|---|---|---|
| Open room, mixed air | 1.25x | Temporary low-density racks | Hot air returns to front |
| Vented cabinet | 1.12x | Network and NAS cabinets | Door restriction |
| Enclosed fan tray | 1.18x | AV cabinets and closets | Weak exhaust path |
| Blanked and sealed | 0.98x | Rack servers and mixed labs | Unsealed cable gaps |
| Ducted rear exhaust | 0.90x | Dense single cabinets | Duct back pressure |
| Contained aisle | 0.86x | Multi-rack rows | Fan failure reserve |
Lower factors assume the delivered air actually reaches equipment intakes.
| Loss source | Typical range | Heat model | Input to tune |
|---|---|---|---|
| Server PSU conversion | 4-15% | IT W / efficiency | PSU efficiency |
| UPS double-conversion | 5-10% | Wall W x loss | UPS/PDU loss |
| Line-interactive UPS | 1-5% | Wall W x loss | UPS/PDU loss |
| Fan trays and boosters | 10-250 W | Direct added watts | Fan heat |
| Future growth | 10-30% | Final multiplier | Safety margin |
When using measured wall watts from a PDU, set PSU efficiency near 100% to avoid double-counting PSU loss.
💡Two cabinet thermal tips
You can start with a little home lab of a couple switches and a NAS, running cool enough that you don’t notice. Add another server with GPUs for rendering, or an additional rack for storage, and your closet is now hot. Where did the heat go? Not gone. You’ve got to get rid of it somehow.
And most of us considers cooling as simply buying a larger air conditioner. But actualy, the effort is where you understand precisely how efficient you can remove the waste heat you generate. That’s where the calculator helps, it does the math for you. What gives it value is knowing what to enter and why these numbers is important.
How to Calculate Your Home Lab Cooling Needs
Second: Don’t assume all your heat comes from your IT load. It never does. Each watt that travel through a power supply loses efficiency as it is converted into electricity within the PSU. That’s waste heat in the cabinet. And if you’re running cheap PSUs or older gear, that add up pretty fast.
Then there are the fans. Sure, those move air and do their job, but they also generates heat while they do so. Not much per fan, but enough on a dense rack to be a big load. The tool accounts for this too, by taking out inefficiency of active cooling and power conversion from the total watts.
That’s not enough air. Most plans stop there: “I’ve got a big-ass air conditioner!” But what good does that do if the servers’ intake fans isn’t getting any air? That’s why the delta-T (the temperature difference between exhaust air and intake air) is key metric. The bigger the delta-T, the fewer cfm of air required to carry away a given amount of heat.
But you can’t blindly max out the delta-T either. Too-high exhaust air temperatures can result in a thermal loop, with hot exhaust air recirculating back into the intake; baking your drives. The tool’s reference tables illustrates the tradeoff: High cfm = more noise + more dust. Looser delta-T = quiet. But it risks overheating if your containment are poor.
The other factor that makes or breaks it all is containment quality. Cooling a sealed cabinet require significantly less airflow than cooling an open rack in a hot closet. If there are blanking panels covering unused rack units, the cooler air doesn’t get mixed with the hotter exhaust air. That means you can run more stuff with lower airflow. Rear ducting helps, too. The calculator accounts for this. You don’t necessarily need as big a fan if your cabinet is well sealed and the exhaust is ducted away from the intake.
Airflow isn’t everything; the path of the airflow matter. This is not padding. This is not an option. Safety margins are not optional. They’re insurance policies against reality.
Fans degrades. Filters clog. Ambient summer temps increase. Calculate for the bare minimum and guess what? You’ll fail on a hot day. Twenty percent margin? That means you have enough cooling capacity for your peak load under less-than-ideal conditions. You also has some breathing room to bring home additional gear without starting from scratch.
You don’t do this to simply keep the lights running. You do this to create an environment that’s consistent, efficient and stable so that all of your equipment runs as it should of.
After seeing what generates the heat and how it escapes, those numbers cease to be theoretical. They become a representation of the physical space. You’ll start to notice where to pour more money into beefier fans or sealing, and where the bottlenecks is occurring.
The heat isn’t going anywhere; however, when you calculate correctly, you know precisely how to deal with it.