PoE Midspan Budget Calculator
Size a PoE injector shelf or midspan chassis by checking port count, per-port class limits, PD mix, cable loss, startup surge, reserve margin, utilization target, and external PSU rating.
PoE midspan budget result
| PoE mode | PSE class budget | Typical PD receive | Common midspan use |
|---|---|---|---|
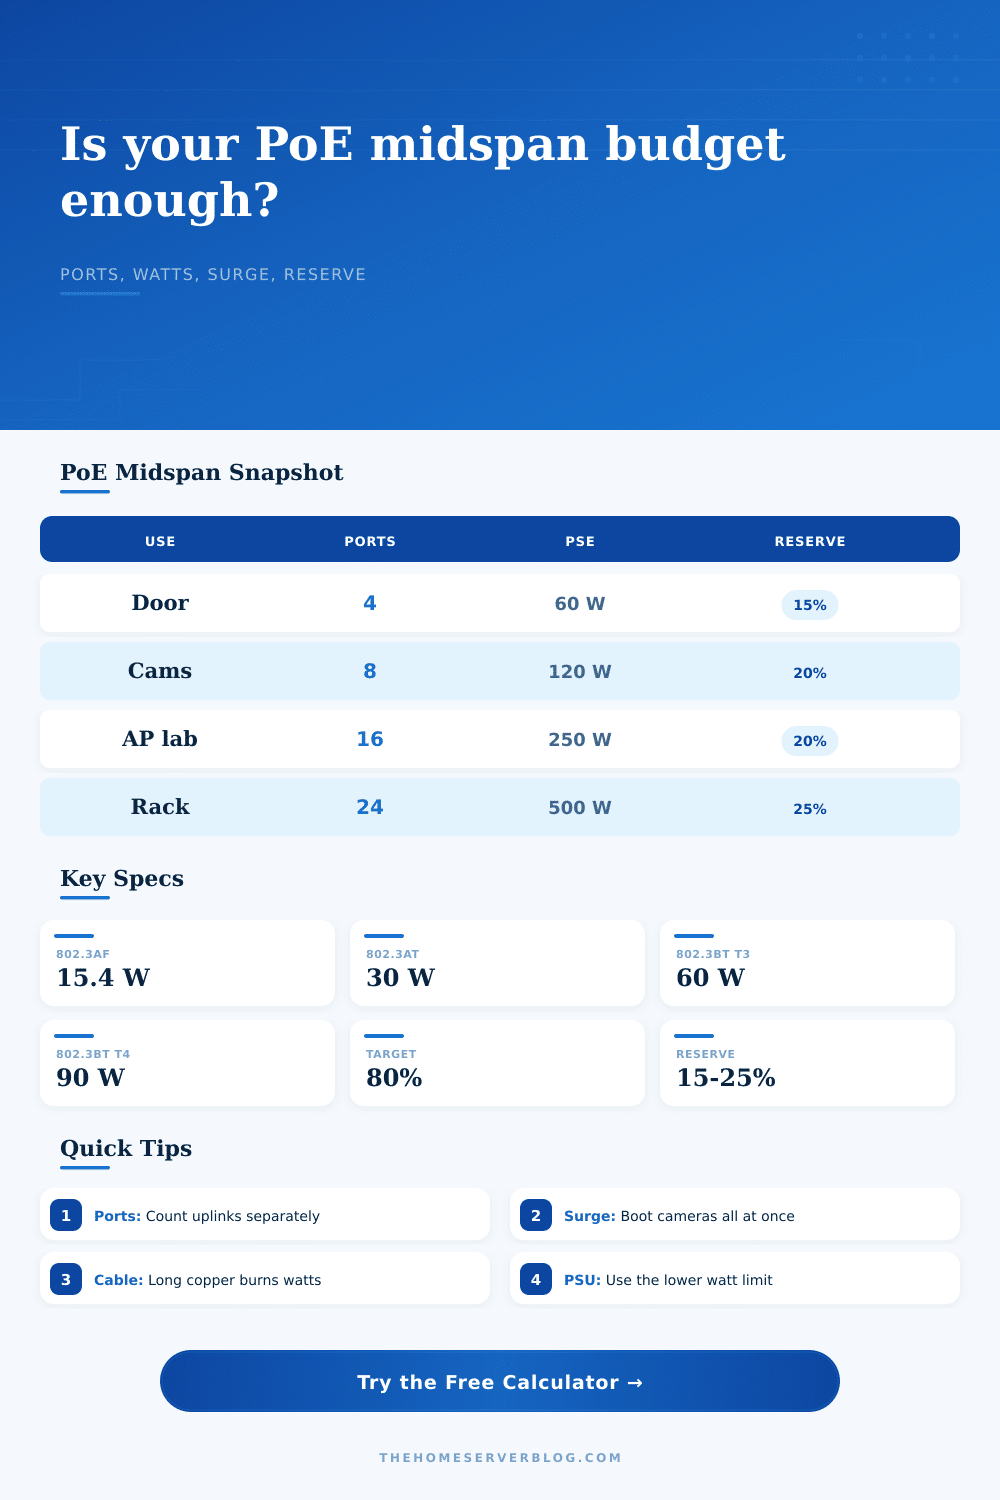
| 802.3af | 15.4 W per port | Up to 12.95 W | Phones, sensors, simple cameras, small bridges |
| 802.3at | 30 W per port | Up to 25.5 W | WiFi APs, better cameras, touch panels |
| 802.3bt Type 3 | 60 W per port | Up to about 51 W | PTZ cameras, thin clients, LED controllers |
| 802.3bt Type 4 | 90 W per port | Up to about 71 W | High-power splitters, displays, compact endpoints |
| Cable case | Planning loss | When to use | Budget note |
|---|---|---|---|
| Short Cat6 patch | 2-4% per 100 m | Same rack, patch leads, cool closet | Loss rarely drives the decision |
| Typical Cat5e/Cat6 run | 6-10% per 100 m | Home or lab structured cabling | Good default for mixed PDs |
| Thin cable or warm bundle | 10-16% per 100 m | Dense conduit, higher temperature, small gauge | Reserve more watts for copper loss |
| Near 100 m with bt load | 12-20% per 100 m | Long Type 3 or Type 4 endpoint links | Check voltage at the PD during startup |
| Midspan size | Useful PSE range | Best fit | Planning warning |
|---|---|---|---|
| 4 to 6 ports | 60-120 W | Doors, cameras, small AP shelf | One Type 3 PD can dominate the budget |
| 8 to 12 ports | 120-250 W | NVR, home office, mixed IoT closet | Camera IR surge can exceed steady load |
| 16 to 24 ports | 250-740 W | Lab rack, AP migration, camera expansion | Use reserve for future port moves |
| 32 to 48 ports | 740-1440 W | Dense lab or small site refresh | Plan staged boot and PSU redundancy |
| Injector vs switch | Midspan injector | PoE switch | Best decision point |
|---|---|---|---|
| Network role | Adds power between switch and PD | Switching and PoE in one chassis | Use midspan when the data switch still works |
| Upgrade path | Power can be upgraded separately | Ports, ASIC, and PSU are tied together | Use switch when port density also changes |
| Failure surface | Separate power shelf and more patching | Single powered network device | Midspan helps isolate PoE faults from switching |
| Lab flexibility | Easy to insert, bypass, or stage boot | Cleaner wiring for permanent installs | Choose by cable management and spare PSU capacity |
Ah yes. I know that feeling. It’s the one where you decide to add another PTZ camera and find out your entire shelf resets the moment you plug it in. You’ve built a little office network, or maybe even just a home lab. The moment you plug in that extra camera and everything reset, you’ll realize your power budget was too tight.
So what do you do? You grab the cheapest thing with most flexibility, the midspan injector. And then because it has so many open ports, you fill them up. And then you ask yourself why it all turns dark whenever you turn on the infrared lights…
How to Plan Your PoE Power Correctly
Why doesn’t this work? It’s not usually the switch logic. It’s not usually the cable quality. It’s almost always watts + heat + reserve margin math. Most people see number of ports and stop there. That’s where things go wrong.
Power come in three layers. Get those wrong, and you’ll be in trouble.
The first layer is steady state load. What do the devices draw if they’re just sitting there quietly? A VoIP phone draws a few watts. Fifteen or twenty for a moddern WiFi access point. The calculator above will do the math for you on these base loads…
But it’s important to know why those inputs matter. You don’t want to choose a per-port class limit higher then your devices require, because then you’re artificially increasing the potential load. You can set all of your ports to the highest possible Type 4 rating without worry; but that’s pessimistic, too. It gives you less headroom for real-world device. Match the class to the hardware you actualy have plugged in: that’s the trick.
Then there’s the surge. That is the dirty little secret of PoE planning. All the processors, motors, and IR LEDs on a camera want to draw power the moment it boots. That first draw is two times than the steady state draw. Boot up eight cameras and now you’ve got a collective surge that has to be managed by the midspan. And if your power supply doesn’t support the surge, it go down. The whole thing plummets to darkness. It is not a slow fade. It is a complete blackout.
Now you’ll most commonly experience this when cameras are triggered by motion sensors at dusk. Twenty-five percent surge margin isn’t just nice to have, it’s insurance against the storm of booting up camera all at one time.
Then there’s the third layer: the reserve. It is for physics and for the future. Power supplies age. Cables get hot. Sometime in the future you’ll want to add another device. Today, if you’re running at one-hundred-percent use on that midspan, then you’ve got zero room for error. Twenty percent reserve keeps things cool, keeps fans quiet, and most importantly means you don’t need to replace the hardware when you decide to add just one more sensor next year.
The calculator helps you visualize that headroom: it compares what your total draw is versus how much the external power supply is rated for. Use the lower of those two limits. Maybe the injector says it can handle two-hundred-watts, but the brick you plugged into the wall was only rated for one-hundred-and-fifty. Brick is your ceiling.
Cable loss is a silent tax on your wallet. Electricity doesn’t like flowing through copper. As electricity flows through the copper, resistance turns some of it into heat; specifically, it’s heating up the wire. It does so in direct proportion to its resistance. That resistance increases with length. It could be a short patch. No problem. It could be a long run through a warehouse. It is a matter of fact. You might have Type 4 or Type 3 devices at the far end of a hundred meters and the voltage drop will be severe. If you enter your typical cable length, the calculator compensates.
It sounds trivial, but losing even a watt or two to resistance means no watts for other device. A little bit, yes. But it is enough when you are near capacity.
The decision between a PoE switch vs a midspan depends on modularity. If you need to add power but your network hardware is working just fine, then you can upgrade with a midspan. This is nice since it doesn’t require swapping out your network equipment. But there’s an added level of complexity. Now you’ve got not one device that might fail, but two. If you know this will be a permanent solution, a PoE switch is cleaner. If you’re setting up a temporary lab or something, a midspan is more flexible.
The tool shows how various scenarios pan out, from a simple four-port door access panel to the balancing act of a forty-eight port lab rack.
At its core though, PoE planning is all about constraints. There’s a fixed amount of power available at the wall. There’s a variable amount demanded by the devices. Your job is to keep those in balance while leaving some slack for when things go wrong (i.e., a cold start). Respect the power supply ceiling. Check your surge margin. Leave yourself some room to grow. Get it right up front and you’ll never see that reset button again.
You should of planned better.